Friday, April 19, 2024

Steak Au Poivre with Miso & Sansho Pepper


Sometimes I really really crave au poivre sauce. Like, the sauce itself with a nice steak, fries, mashed potatoes, etc. So when cabagges.world showed this recipe on their Instagram, I knew I had to try it.

Guys. It was SO GOOD.

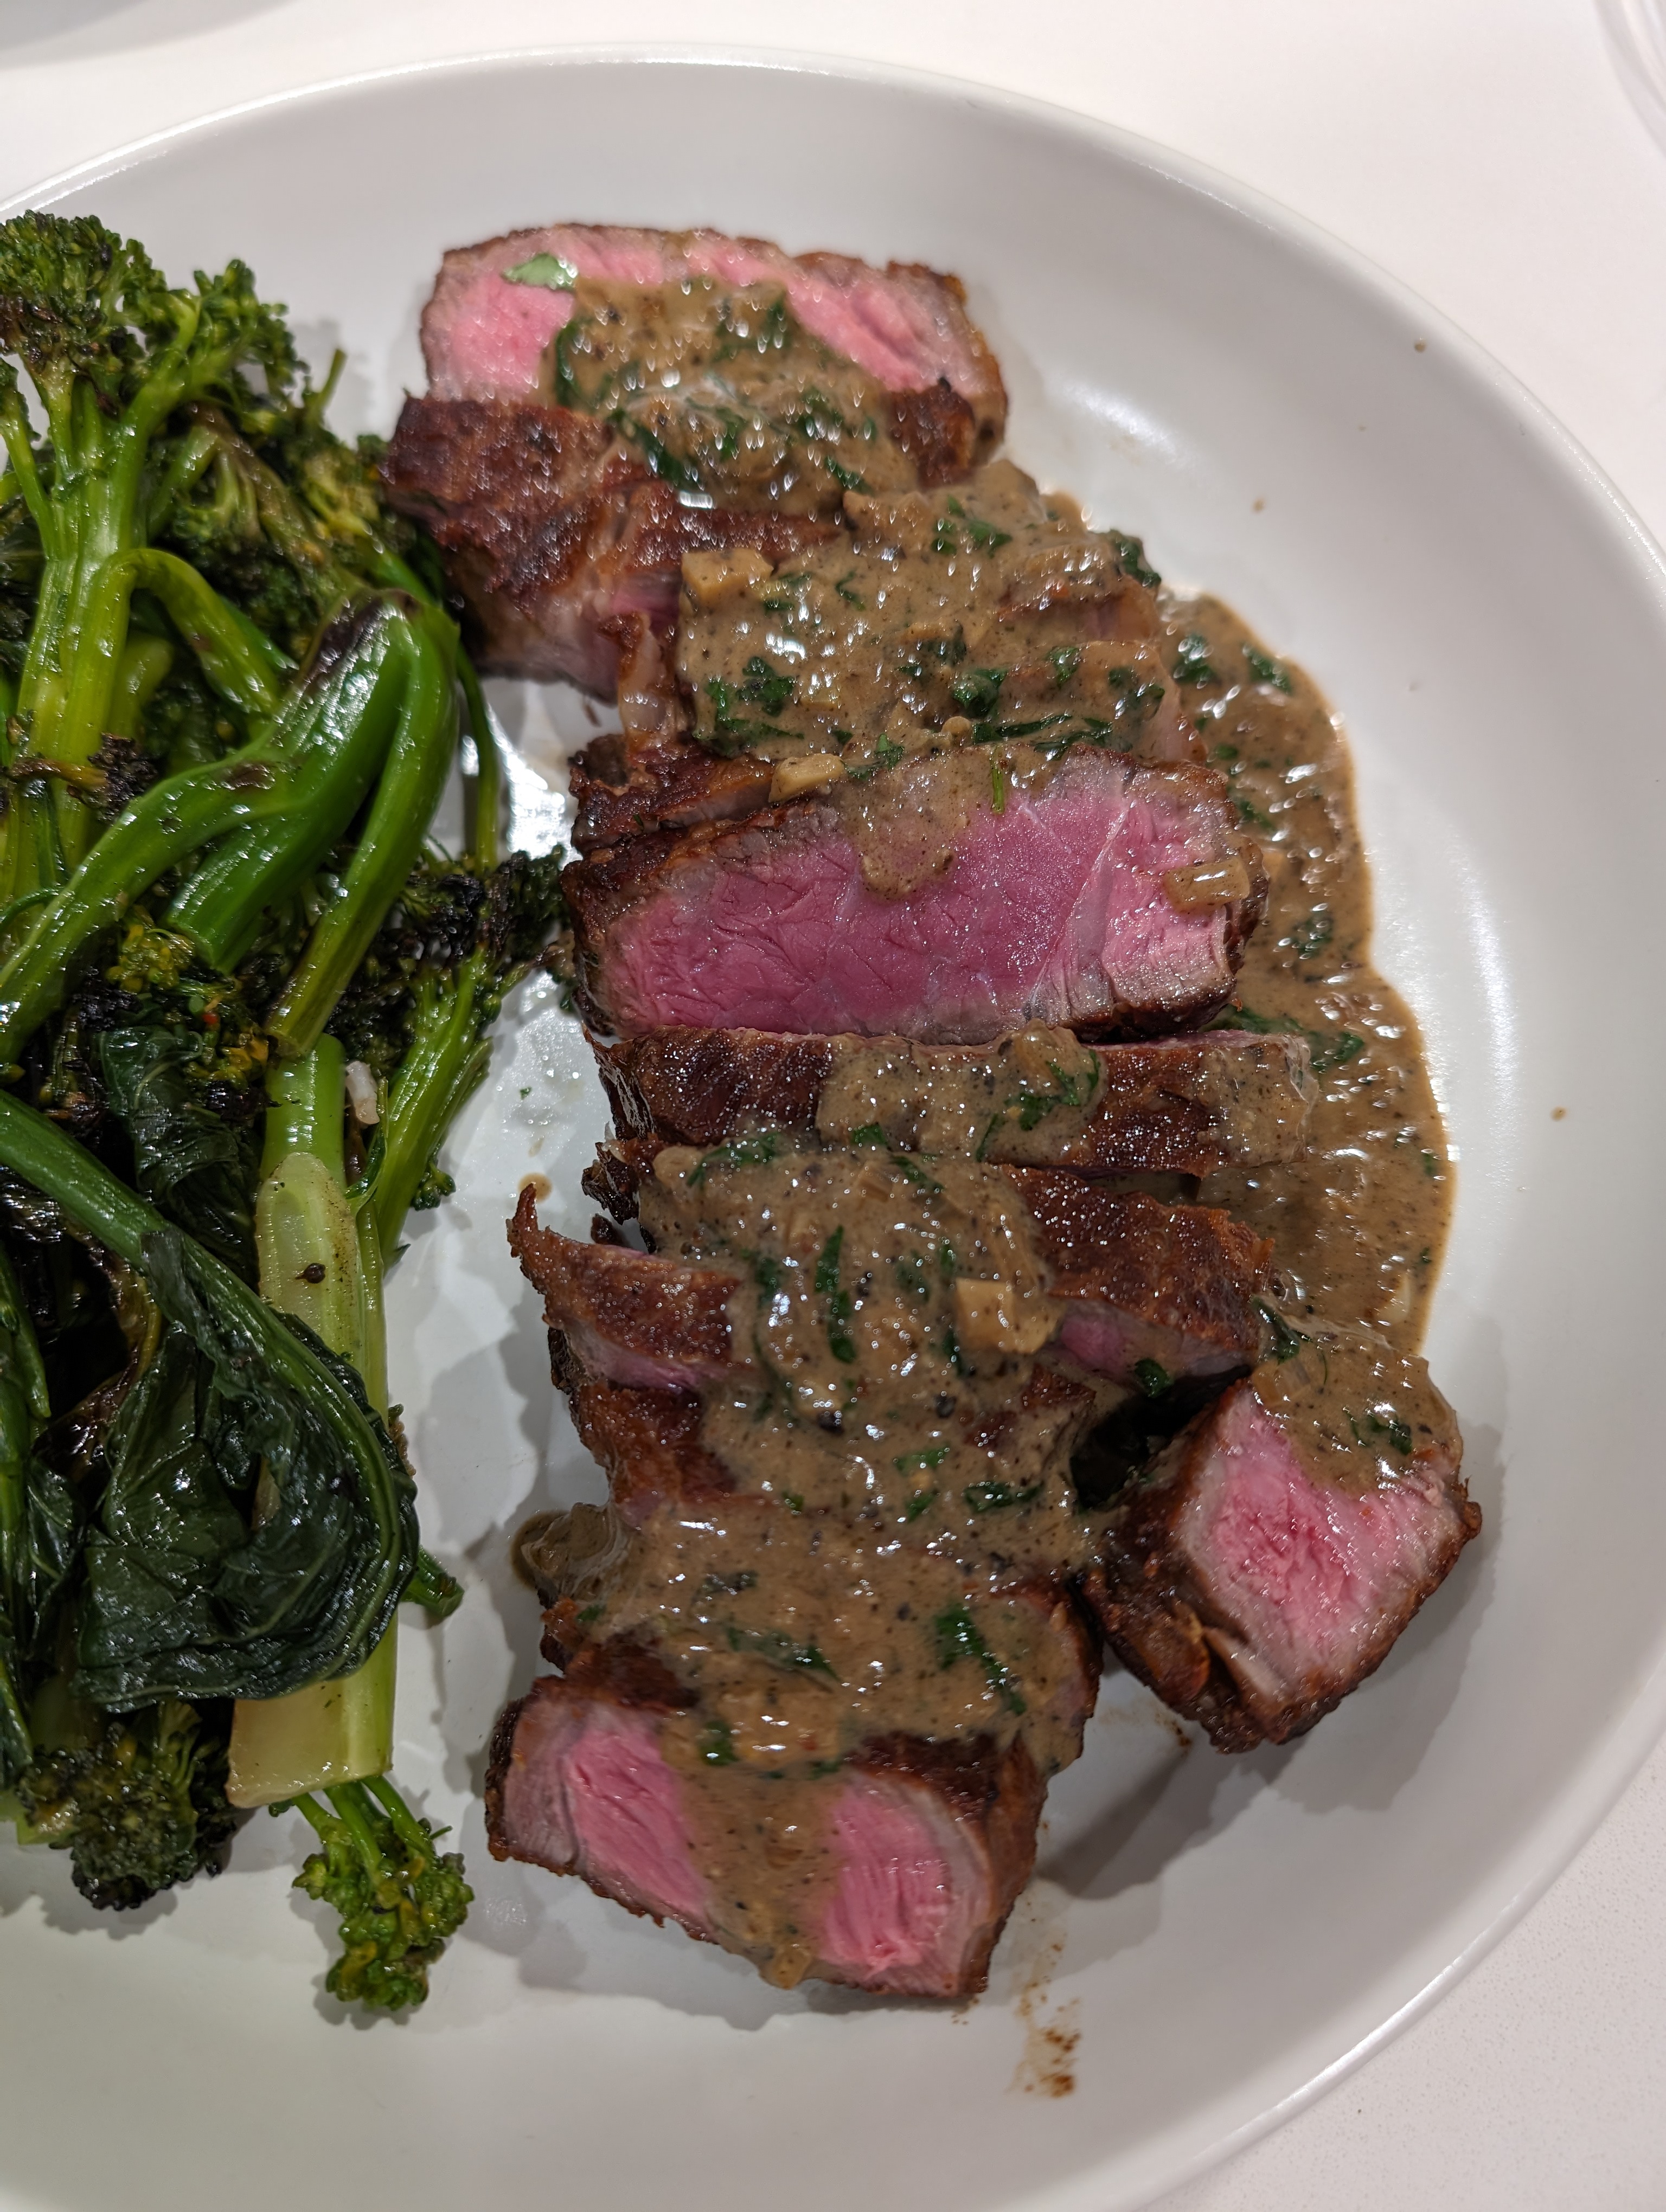
I think I only had cilantro instead of parsley but it was fine. Everything else was amazing. It makes enough sauce for 2 steaks very generously, or I'm sure you can stretch it out to four steaks. Make sure you season your steak but not too aggressively because the sauce has a good amount of salt in it from the miso and the beef broth.

Steak Au Poivre with Miso & Sansho Pepper
Adapted from cabagges.world

1 1-1.5" thick ribeye steak (or whatever kind you prefer)
2 clove garlic, minced
1 shallot, minced
2 tsp ground pepper (preferably fresh ground)
1/2 cup sake
1/2 cup beef broth
1 Tbsp miso
1 tsp Sansho pepper
1.4 cup heavy cream
1/4 cup parsley (or in my case, cilantro)

Make sure steak is at room temperature (take it out of the fridge about 45-60 min before cooking). Rub steak all over with a neutral oil and then season both sides with salt and pepper. Heat a cast iron pan on high-ish. Sear steak for two minutes, then flip to the other side for another two minutes. Repeat. Then do each side for 1 minute more. This should get you medium rare. Adjust the cooking time further if you want it more cooked but the steak should be flipped every two minutes.

Turn heat to medium and without adding more oil, add garlic, shallots and pepper. Cook for about 30-45 seconds until shallots are translucent.

Turn heat up slightly and pour in sake to deglaze. Scrape with a wooden spoon and then reduce sake by half.

Turn heat down to medium and add beef broth. Bring to a low boil, add in miso and sansho pepper, and stir to combine.

Turn heat to low, then add heavy cream. Stir and reduce until it thickens to a gravy-like consistency. Taste and adjust for additional salt.

Add butter and parsley, stir to mix through and then serve!

Sunday, March 31, 2024

Passion Fruit Mousse


We have a HUGE passionfruit vine in our backyard and it goes crazy throughout the year. I actually feel bad when I end up throwing some of them away because I know they're so expensive at the market. So I found this recipe for passion fruit mousse and I try to make it as often as I can. It needs a ton of passion fruit (like 20-25 of them, though you can use store-bought unsweetened passionfruit juice concentrate as well).


If you're using fresh passion fruit, prepare your 1 cup for the mousse by blitzing the pulp for a few seconds in a blender or Nutribullet. This loosens the membranes, which cling all the seeds together. Once blitzed, you can pass it through a sieve to get the juice. Use the back of a spoon to rub the seeds and push out as much juice as you can through the sieve. You should be left with a scoop-able spoonful of almost-dry black seeds once you're done. I did this in a few batches with the sieve directly on top of the measuring cup.

You'll have some bits of broken up seeds (which is totally OK by me) but if you're totally not into that, you can skip the blending and just push as much juice through the sieve as you can.


Passion Fruit Mousse
Adapted from Olivia's Cuisine

1 1/3 cups (290g) heavy cream, cold
1 can (397g) sweetened condensed milk
1 cup (265g) passion fruit pulp or unsweetened juice concentrate

1/3 cup fresh passion fruit pulp (with seeds)
3 Tbsp granulated sugar

Blend together the cream, condensed milk and passion fruit pulp in a blender for 3 minutes. Pour into dessert cups or ramekins (or small deli containers, as shown above). Refrigerate for at least 3 hours. Garnish with passion fruit topping; directions below).

In a small pan over medium-low hear, cook together the fresh passion fruit pulp and sugar together until the sugar dissolves. Continue to cook until topping thickens, about 2-3 minutes. Spoon evenly over the top of the passion fruit mousse. Cool to room temperature before topping mousse.

Topping can be made ahead of time and then refrigerated until needed. 

Friday, August 4, 2023

White Cut Dipping Sauce

 I'm not sure if "white cut" meat is a Chinese, Taiwanese or Cantonese thing but IT'S SO GOOD. You can get white cut meat in the form of chicken, pork belly, pork cheek or my favorite, goose.

I need to get the dipping sauce recipe off my mind before I forget it!

Dipping Sauce:
2 Tbsp light soy sauce
1 1/2 tsp Chinkiang black vinegar
1 1/2 tsp white sugar
1/2 tsp sesame oil
5 cloves garlic, minced
2 tsp minced ginger
1 tsp chopped green onion

Friday, April 28, 2023

Italian Roast Pork with Salsa Verde

 
I have been making this recipe for over ten years. For the longest time, I had just a paper printout of the recipe but when I went to make it last week, IT WAS GONE. I panicked. Luckily, I remembered enough key words from the "story" that was part of the post that I was able to find it again online.

Now that I've found it again, I've learned my lesson and have to blog about it so that I never lose it again. I'm also scared that the website will shut down or something, and then I'll also lose it!


This recipe is SO GOOD. I reduce the fennel from 1 Tbsp to 1 tsp since I don't like a super strong fennel flavor. And make sure to make double the salsa verde because it's so delicious. My adaptation below is for double the original recipe. Trust me on this. I also baste every 45 min.

Final tip. Make sure the wine is at room temp when you pour it into the glass Pyrex, and please do it slowly so it doesn't shock the glass. I guess at some point, I had a Pyrex that had a nick in it or something because when I poured the wine in, the entire glass exploded into pieces!


Again, this recipe is low and slow, at least 4-6 hours of time. It's definitely a weekend, or a work from home recipe.

Italian Roast Pork with Salsa Verde
Serves 6-8
Adapted from We are Never Full

4-6 pound bone-in pork shoulder (sometimes called pork butt)
  • 2 Tbsp fresh rosemary
  • 2 Tbsp fresh sage
  • 2 Tbsp fresh parsley
  • 2 Tbsp fresh thyme
  • 1 tsp fennel seed
  • 6 cloves of garlic, chopped
  • 1/3 cup olive oil
  • pinch of peperoncino
  • 1 cup white wine (I usually use vermouth)
  • 3 cloves garlic, chopped
  • 2 Tbsp rosemary
  • 2 Tbsp sage
  • 2 Tbsp chives (optional)
  • 1 cup parsley
  • 5-6 anchovy fillets
  • 2 Tbsp red wine vinegar
  • Zest and juice of 1 lemon
  • 1/3 cup olive oil

  • Preheat oven to 475 degrees F.

  • Add herbs, fennel seed, garlic, peperoncino and salt/pepper into a food processor and pulse a few times. Push down any of the paste that may have accumulated on the sides of your blender with a rubber spatula. With the lid on and the blade going, add your olive oil into the mixture so that it all incorporates and makes a paste.

  • Make 1-inch deep slits all over the pork (even in some of the skin). You can stuff a clove of garlic into each of the slits, if you wish (sometimes I do that). Generously salt and pepper the pork all over. Rub your marinade all over the pork and poke some into each slit. Fat side up, place pork in a roasting pan. Roast pork uncovered for 1 hour.

  • After the hour is over, remove pork from oven and add the wine to the bottom of baking dish. Use a spoon to pick up some of the brown bits. Tent some aluminum foil over the pork and put back in the oven, turning oven down to 275 degrees. Cook for 4-6 hours more, approximately one hour per pound (the first hour doesn't count). Baste with the drippings every 45 minutes.

  • Make your salsa verde (this can be made up to one day ahead of time). Add your herbs, garlic and anchovies in your food processor. Puree as best you can with no liquid in there. Scrape the sides of the blender and puree again. Scrape the sides again. Add the red wine vinegar, lemon zest and about half of the lemon juice. Blend and scrape. Finally, with the motor running and the lid on, slowly drizzle your olive oil into the mixture until it’s completely emulsified. Give it a taste and season accordingly with salt, pepper and additional lemon juice. Blend one final time.

  • About 40 minutes before the end of your final hour of cooking time, remove the foil from the top of the pork. This will cook the skin a bit more. Remove pork when done and allow the pork to rest 15 to 20 minutes before slicing. Make sure you do this, so the juices redistribute! Otherwise the pork might get dry.

  • Serve with rice, mashed potatoes, risotto and/or greens. So good and always a showstopper!

Wednesday, April 19, 2023

Satay Beef with Ong Choy


I love this dish so much. Sometimes I just crave the flavor of it and I just really want to eat a bunch of it, with fluffy white rice. Documenting the recipe here, so I don't ever forget how to make it. Note that the "satay sauce" is Taiwanese barbeque sauce, and not the Thai satay sauce. Bullhead is my favorite brand.


Satay Beef with Ong Choy
Serves 4

Marinade:
2 cloves chopped garlic
1 Tbsp Shaoxing wine
1 Tbsp cornstarch
1.5 tsp soy sauce
1.5 tsp satay sauce

8 oz thinly sliced beef, pork or lamb
10 oz ong choy / water spinach
3 cloves smashed garlic

3-4 Tbsp satay sauce
1/2 tsp salt
1 chopped red chili pepper

Combine the meat with the marinade ingredients. Let sit for 10-15 minutes. Add in 1 tsp of oil before cooking, so the meat separates more easily while being cooked.

Heat a wok over high heat and add 2 Tbsp oil. Add garlic for about 10-15 seconds, then add meat and stir fry until almost fully cooked. Remove from wok. Add in ong choy and stir cry constantly until the leaves are dark green, which happens very quickly (within 1-2 minutes). Make sure to mix constantly.

Return the meat to the wok, add the remaining ingredients and mix to combine well. Taste and add more satay sauce, if needed.